

Virtually There: Presentations that Pop!
Introduction
Joe Graziano provides an excellent overview of leveraging OBS Studio when conducting his remote presentations.
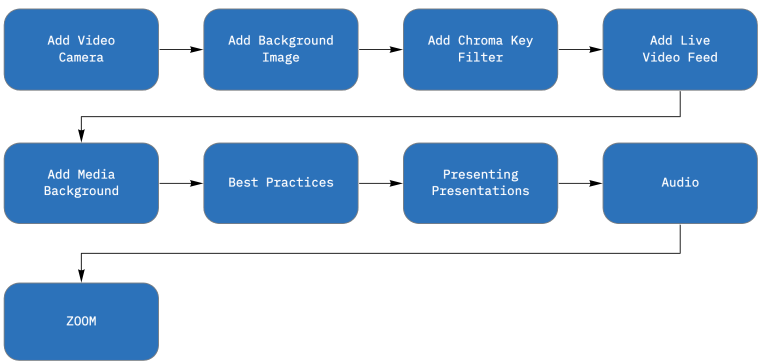
Basic Workflow
This is the basic workflow to get this solution working:
What are the costs involved?
NOTE: We are not endorsing these products but have used them in our own studios and find them to bring a lot of value to the overall solution.
Recommend Combo Options 1 ($328.88):
[table id=13 responsive=flip /]
RecommendCombo Options 2 ($183.99):
[table id=14 responsive=flip /]
Recommend Combo Options 3 ($92.91):
[table id=15 responsive=flip /]
Other recommend items:
[table id=16 responsive=flip /]
OBS Studio Software
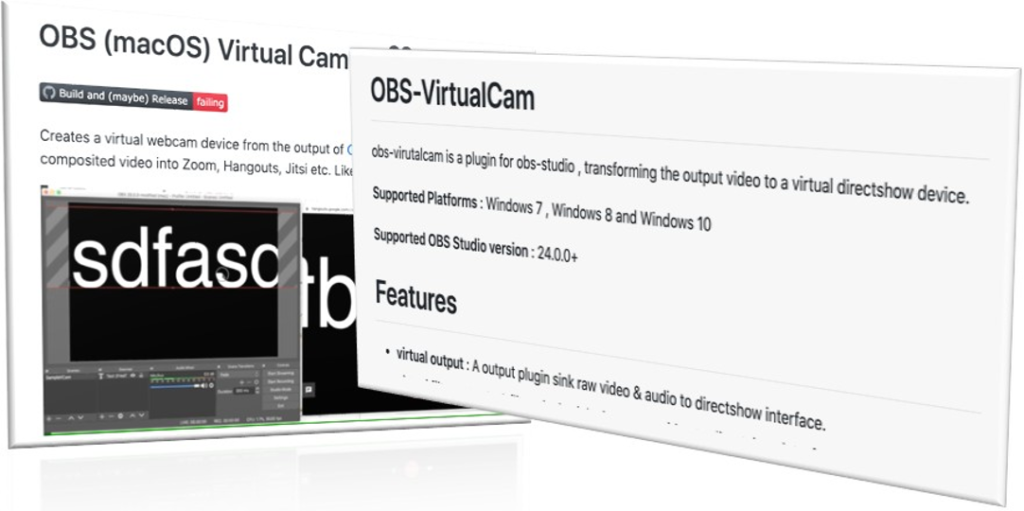
Download OBS Virtual Cam and Install
Note: The lastest versions of OBS Studio Include the Virtual Cam feature and do not require these added steps for the plugin.
PC Platform:
Mac Platform:
This plugin provides a DirectShow Output as a virtual webcam.
How to Install without installer:
1) Go Github Release to find zip file
2) Unzip OBS-VirtualCam2.0.1.zip and put it to your obs-studio install folder
3) Run CMD as Administrator and register 32bit DirectShow source
ex: regsvr32 “C:\Program Files (x86)\obs-studio\bin\32bit\obs virtualsource.dll”
4) Do it again to register 64bit DirectShow source
ex: regsvr32 “C:\Program Files (x86)\obs-studio\bin\64bit\obs-virtualsource.dll”
Register failed during installation
It’s usually due to dependency reason . There’s a chance you need to install visual studio 2017 redistributable package (2013 if the plugin version is 1.x.x ), also the DirectShow interface needs the DLLs swscale-4.dll and avutil-55.dll in you obs install directory.
OBS Frequently Asked Questions
For more infromation please see the OBS Frequently Asked Questions
OBS Training Resources & Tools
[table id=18 responsive=flip /]
WebCam Setup
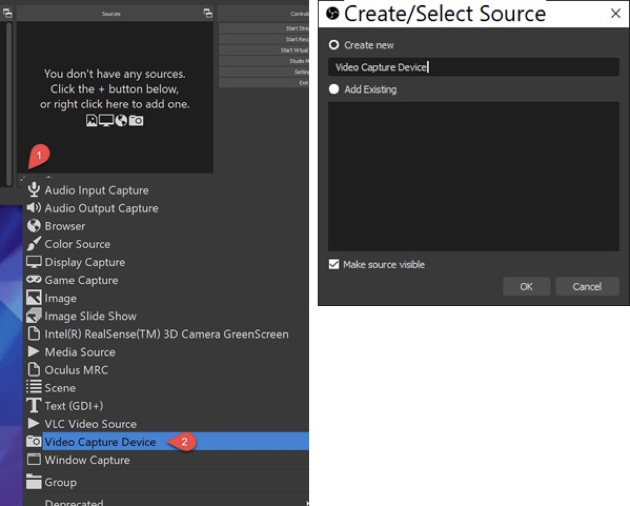
1) Select the ‘+’ button under ‘Sources’.
2) Select ‘Video Capture Device’
Provide a name for your capture device or leave with the default and select ‘Ok’
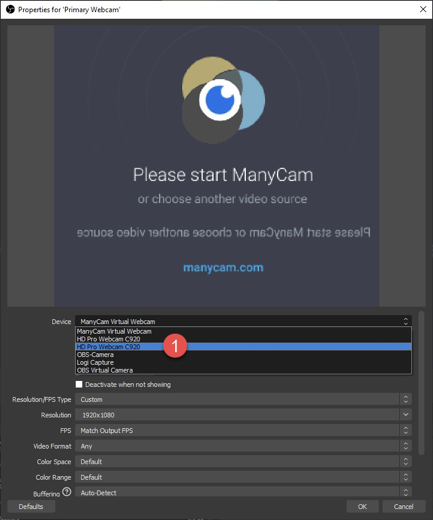
1) On the next dialog select your webcam from the drop- down options
Select ‘Ok’
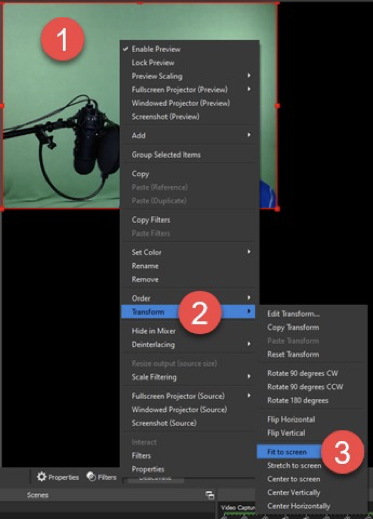
1) Select your webcam frame and right-click
2) Highlight ‘Transform’ in the context menu
3) Select ‘Fit to screen’
Adding a background to your live feed
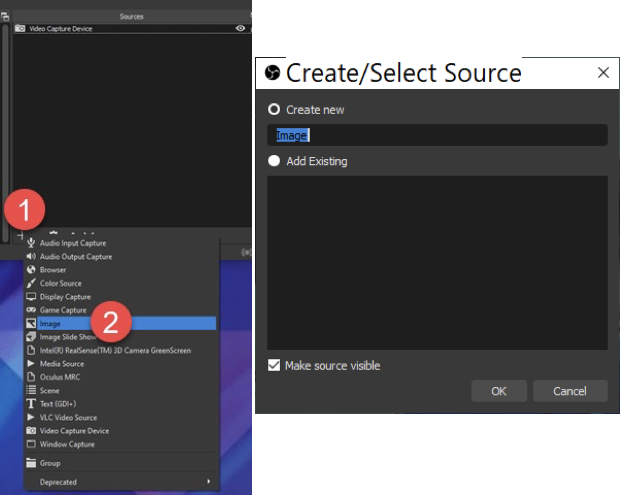
1) Select the ‘+’ button under the Sources window to add an image
2) Select ‘Image’
3) If new, give your image a unique name. Images can be re-used across scenes and save in OBS
Select ‘OK’

Locate and select the image you want to use.
Checking ‘Unload image when not showing’ removes the image from memory. This is helpful if you have lots of scenes that you plan to cycle through
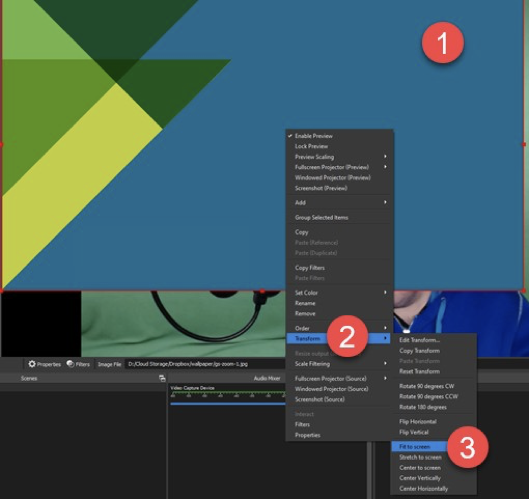
1) Right click the image
2) Highlight ‘Transform’
3) Select ‘Fit to screen’ and your image will be full-screen
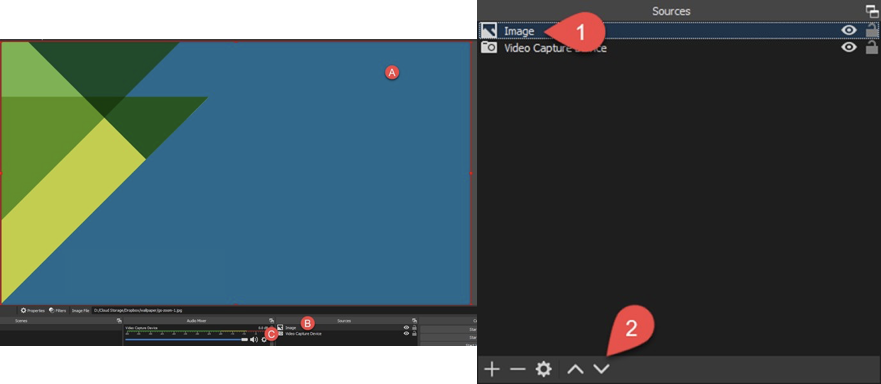
In the sources block you want this image at the bottom so that it remains your ‘Background’
1) Select the image you added
2) Click the down arrow until it is at the bottom of the sources
Once we arrive at this step any sources you add will be on top of the background. Like other images, cameras, windows, or videos.
Enabling Webcam Chroma Key
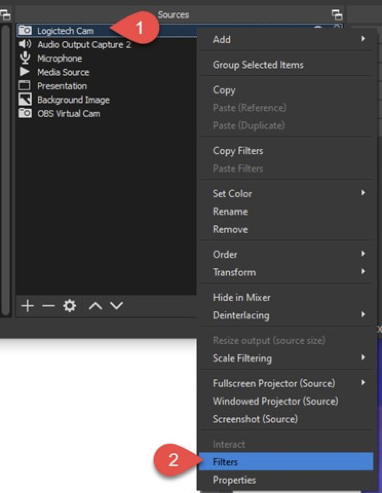
1) Select your camera under sources and right- click
2) Select ‘Filters’
You can give each Chroma Key filter a unique name to enable multiple versions for different scenes or testing.
1) Your background should still be shown with no masking
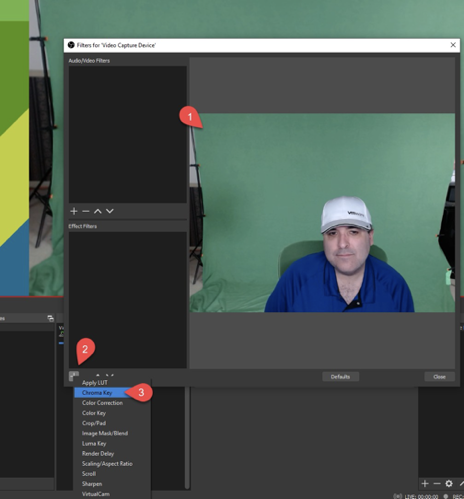
2) Select the ‘+’ button to add a filter
3) Select ‘Chroma Key’ and proceed to the settings to tweak further
Your background will fade somewhat
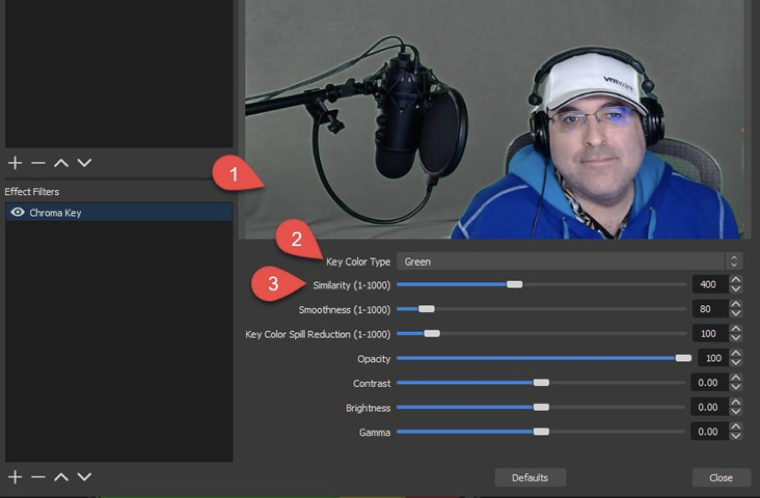
1) Chose your color type, you can pick Green, Blue, Magenta or even make your own Custom color
2) Dragging the Similarity will look at your background color and you can dial in the removal
3) Here is an example of adjusting your Chroma Key to fade the green background:
Adjusting the crop you can trim the edges for an even smoother look.
Cropping your live webcam feed
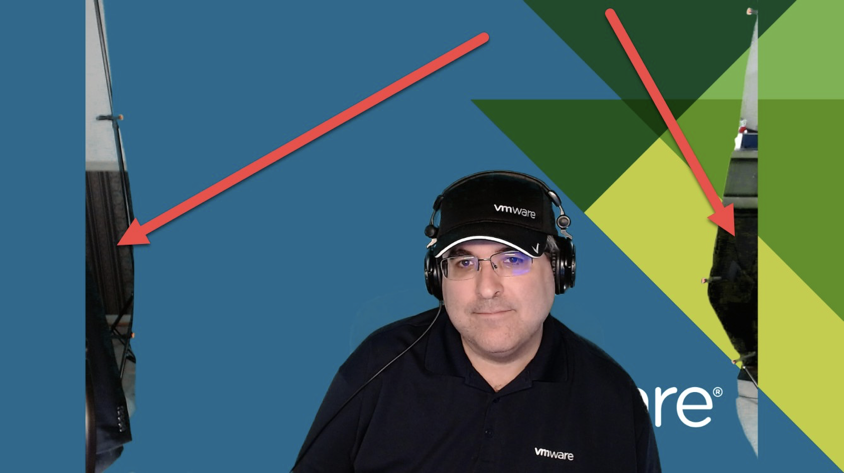
Even with Chroma Key, some background elements can creep in, especially around the sides.
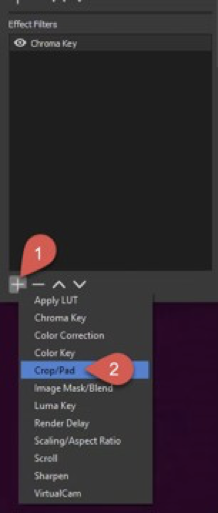
To fix this we add a Crop/Pad filter like you did with Chroma Key.
Adjusting the crop you can trim the edges for an even smoother look.
Adding a media background to your live feed
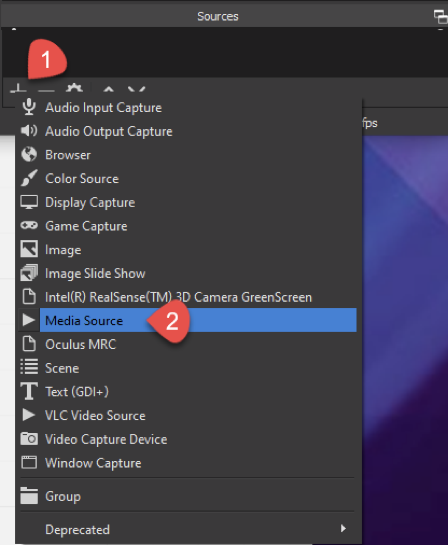
1) Lets say you want an animated background.
2) Click + under sources and ‘Media Source’ Give it a name and click ‘Ok’
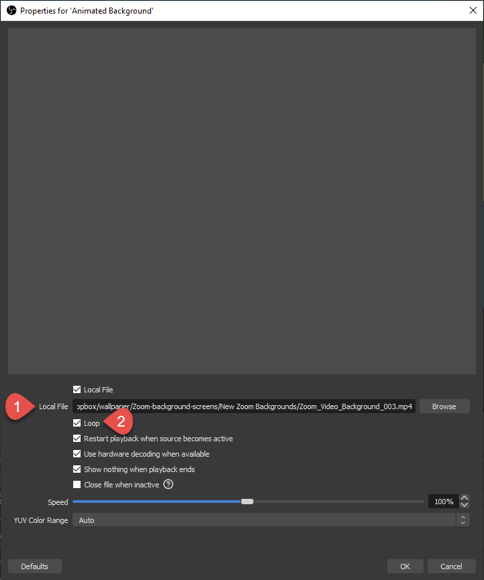
1) Browse to your file
2) Set the video to ‘Loop’ this way it restarts while in use
1) Just like when adding an Image background select the image source.
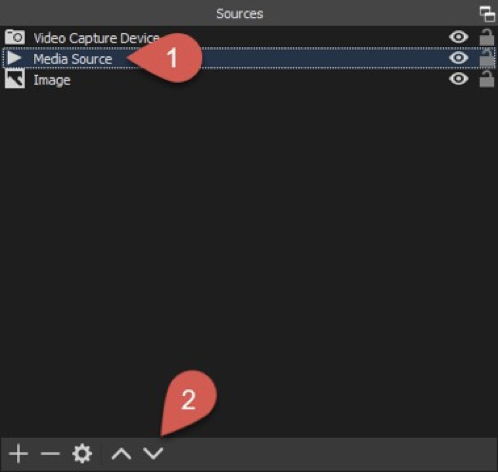
2) Click the arrow down to push the Media Source to the bottom of the scene.
Incorporting your live feed into a Presentation
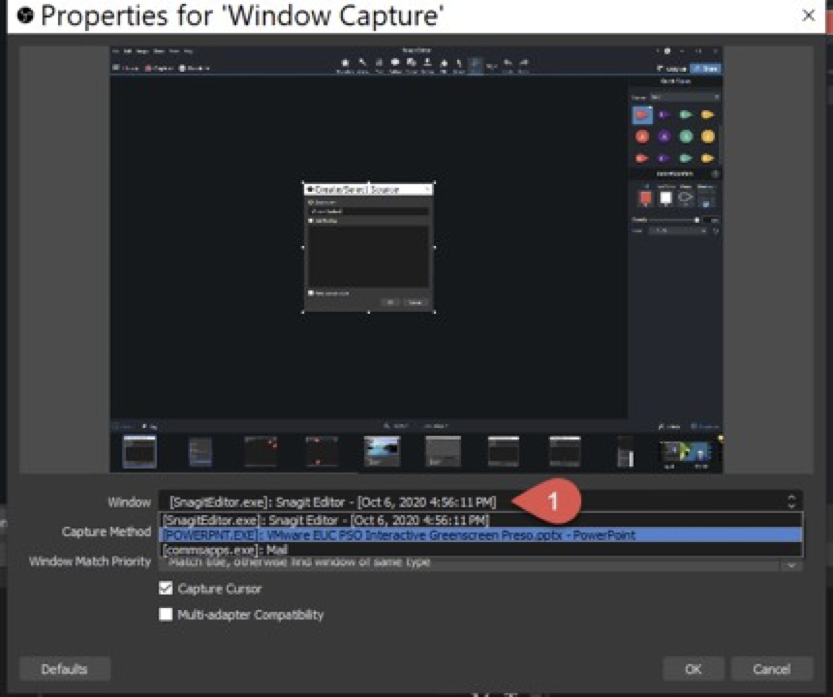
You can add your presentations by adding a ‘Window’ source and selecting your running application
Move the Window capture below your Video capture so you are still on top for the recording.
Audio Input/Output
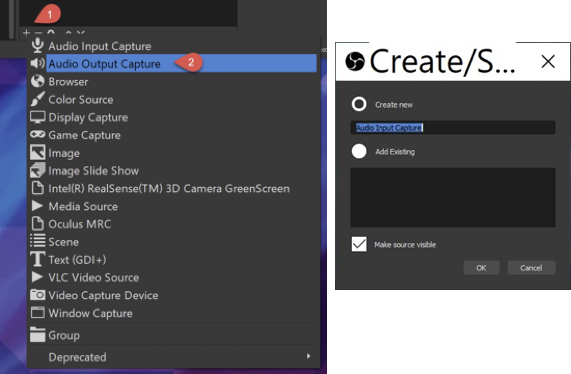
1) Select the ‘+’ button to add your audio device.
2) Select ‘Audio Output Capture’
Add an Audio Output device and give it a good name for future use
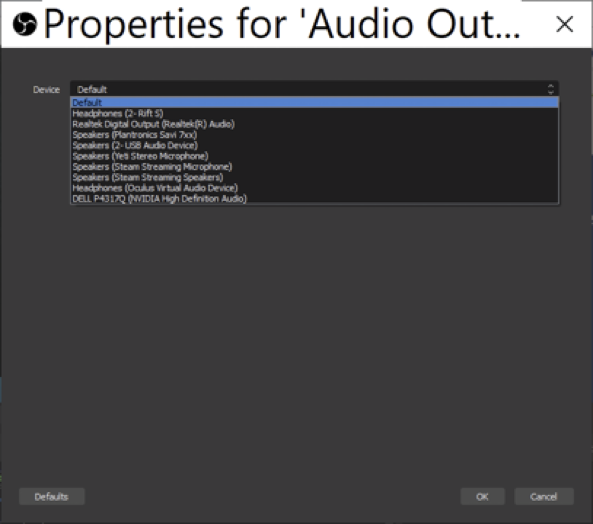
Select from the list of current audio devices configured in your system. Next add an Audio Input like your USB or headphones microphone.
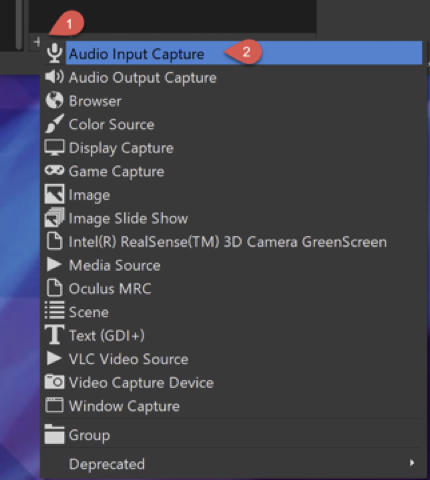
1) Select the ‘+’ button to add your audio device.
2) Select ‘Audio Input Capture’
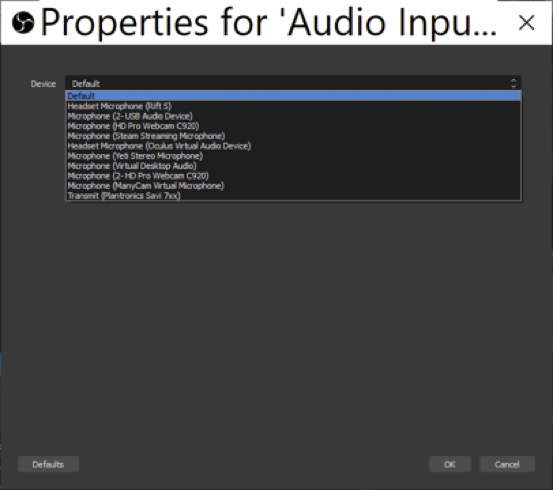
From the list of inputs on your system select the device you want to use.
Presenting through ZOOM
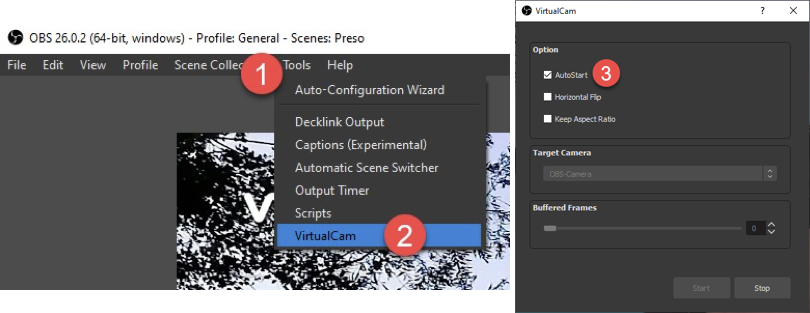
1) Select ‘Tools’
2) Select ‘VirtualCam’
3) You can make this plugin ‘AutoStart’ for future OBS sessions
Once you have downloaded the Virtual Cam plugin from the OBS website we need to activate it so you can share content and your live stream through Zoom.
Create a new Scene and set it to ‘Windowed Projector’
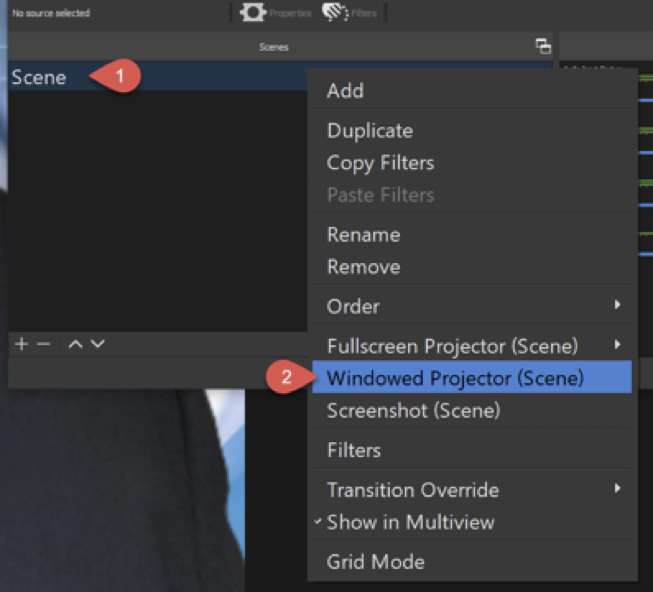
1) Right-click your Scene
2) Highlight ‘Windowed Projector (Scene)’ and Left-click to select
Note: Best practice is to use “Fullscreen Projector (Scene)”, if possible. You will need a 2nd monitor to use this feature.

Here you can see the results of your new scene with any elements you may have added.
Note: When using ‘Window Projector’ The new projector window will be very choppy, and you will need to resize it before sharing it through zoom. If the window size is not correct when you do your presentation, some text will blur to participants!
To get this scene into Zoom start your video, choose settings and select ‘Video’
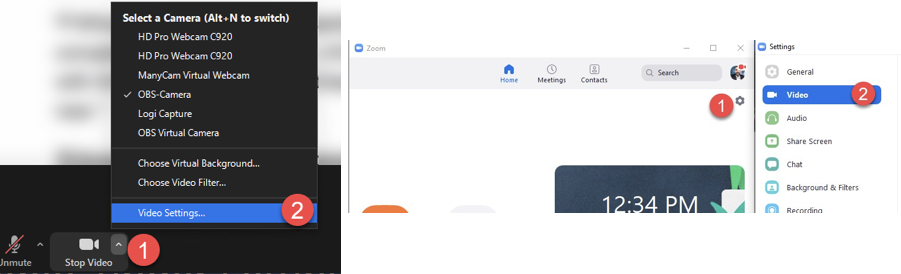
1) Select the up-arrow to the right of the ‘Start Video’ icon in Zoom. Or select the gear icon on the Zoom client.
2) Select ‘Video Settings…’ or select ‘Video’ under settings.
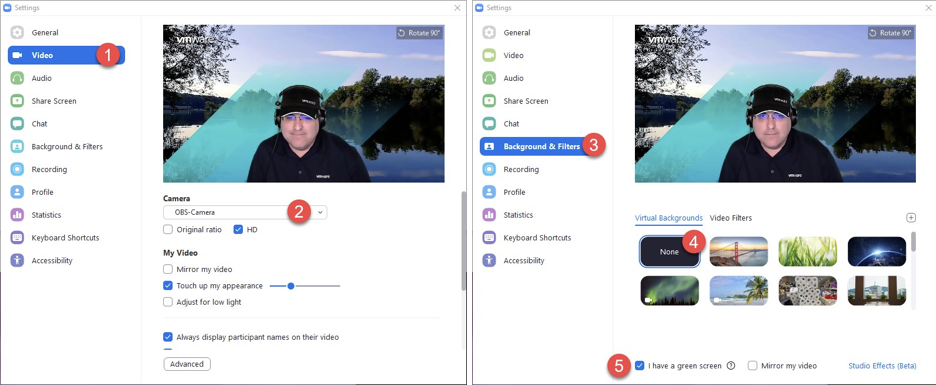
1) Select ‘Video’
2) Select the drop-down the list under Cameras and choose ‘OBS- Camera’
3) Select Background & Filters
4) Select ‘None’
5) Check the checkbox ‘I have a green screen’
6) When you are ready to share content along with your live video stream:
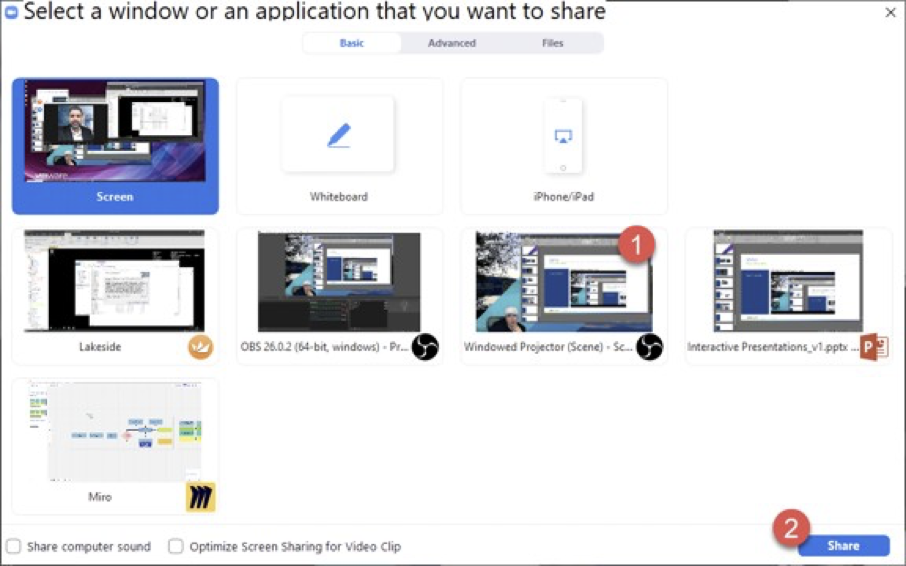
1) Select the ‘Share’ icon in Zoom followed by the new ‘Window Projector (Scene)’
2) Select ‘Share’
Next setup your presentation in Slide Show mode by choosing ‘Browsed by an Individual (Window)
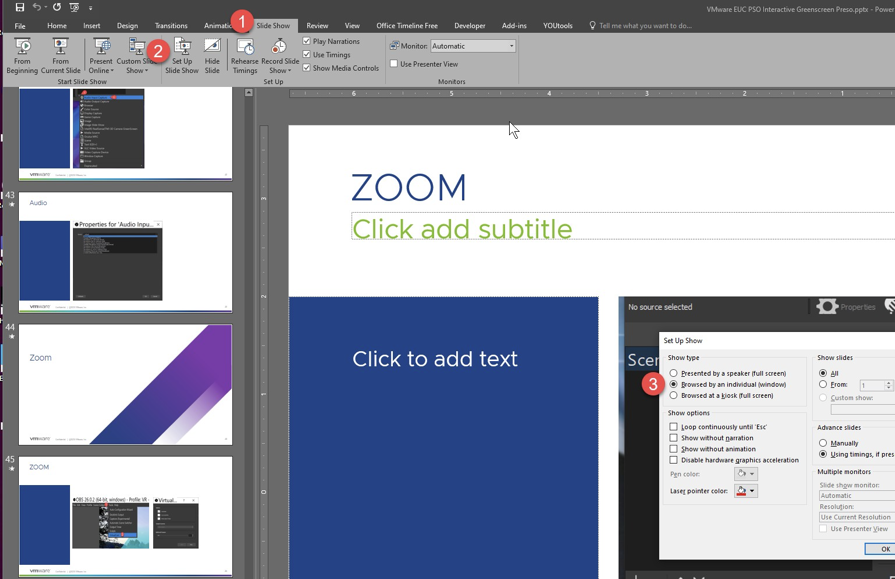
1) Select ‘Slide Show’ from the ribbon within PowerPoint
2) Select ‘Set Up Slide Show’
3) Select ‘Browsed by an individual (window)’
Duplicate this scene so you can now have multiple options, add other elements like backgrounds, videos or additional presentations.
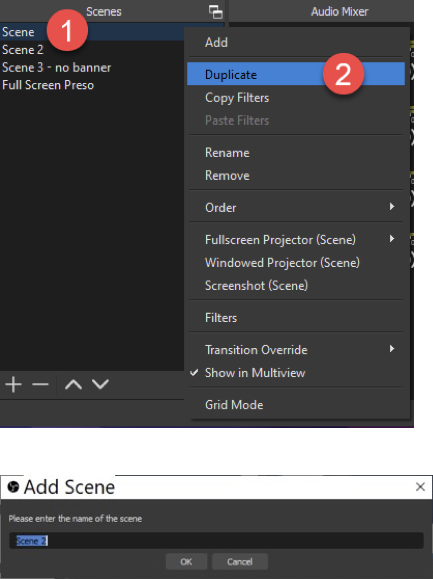
1) Right-click on the scene you need to duplicate.
2) Select ‘Duplicate’
Provide a name to the newly duplicated scene
This video pulls it all together showing you the elements of setting up a basic scene. This next video briefly shows the effect of switching between scenes.
Best Practices
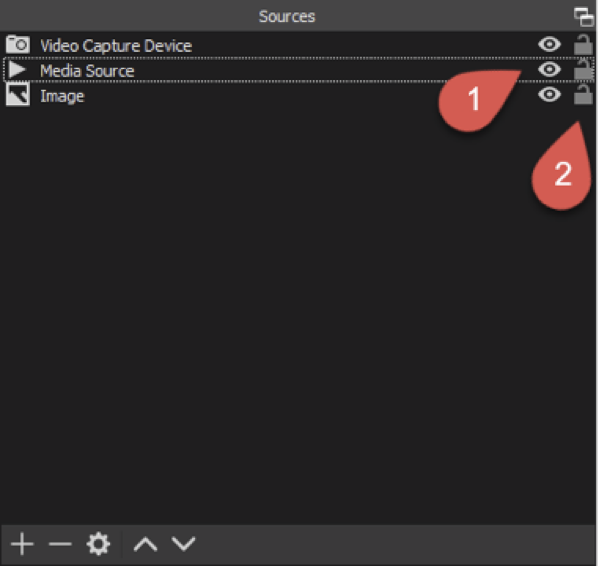
1) Toggling the ‘Eye’ will show or hide that Source from your scene
2) Locking a source will prevent you from being able to edit the properties. You can still hide (eye) or move it around in the source list
Note: I also recommend not using an animated-based background when presenting. If you need to pause the live session for any reason, this will be noticeable to your participants. You will sometimes want to “pause” the feed to fix your camera’s focus.
Thank you for your time, I hope others will find value from this post.
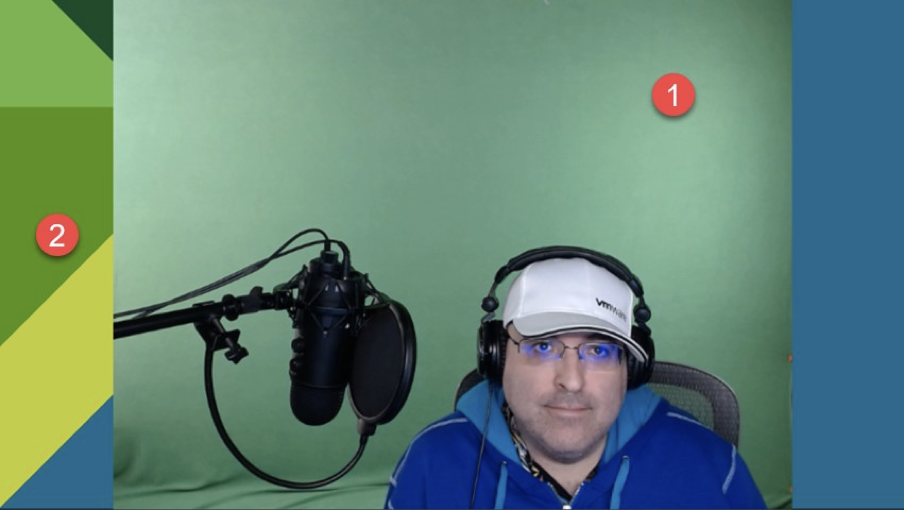
Here is a few pictures of my studio:


Nice work guys! I’ve been chasing this squirrel for some time.